
Apr 22nd 2022
Methods for Rigging Ballyhoo for Maximum Success
Whether you’re preparing to head out to sea for a tournament or for leisure for large saltwater fish, it’s essential to know a few methods for rigging ballyhoo for maximum success. Of course, you can opt for a pre-made ballyhoo rig to speed up the process but we also wanted to share a few of our favorite methods for rigging ballyhoo for trolling. Read on to discover step-by-step instructions for how to rig ballyhoo and you’ll be on the road to successfully reeling in sailfish, marlin, tuna, dolphin, and other large pelagic fish in no time.
The Pin Rig Method
The pin rig method is one of the most popular methods for rigging ballyhoo. This method is also ideal if you plan on placing your bait behind a skirted trolling lure. Follow the below instructions to construct your own rig.
Constructing this ballyhoo rig requires the following tackle:
- Monofilament Test Leader
- Rigging Wire or Bait Spring
- ½ Ounce Egg Sinkers
- Single or Double Barrel Crimps
- #10 Wire
- Mustad Hooks
- Chafe Tubes (optional)
Instructions

Assembling The Rig:
- Step 1: For this ballyhoo rigging technique, start out by sliding the crimp onto the leader. If you are planning on using a bait spring, make sure to slide it on first before the crimp.
- Step 2: Next, slide on the ½ ounce egg sinker and then the chafe tube (optional).
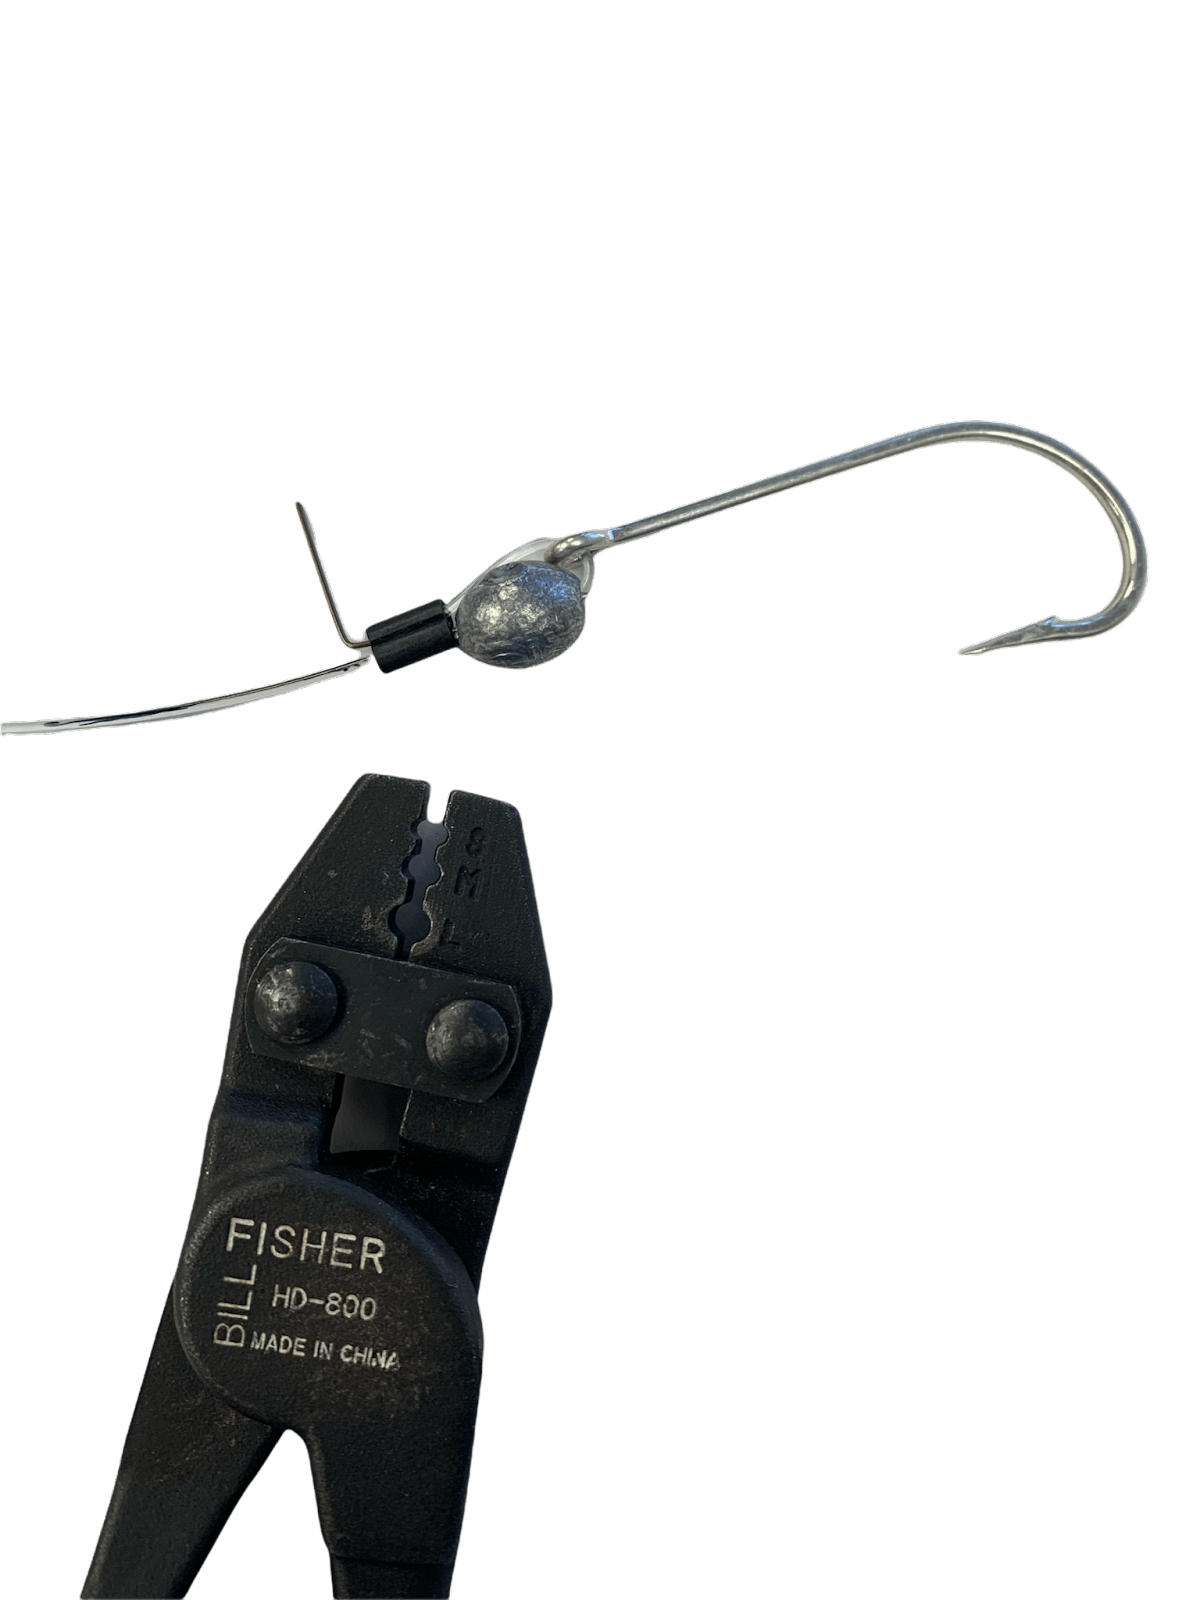
- Step 3: Then, slide on the Mustad hook and back into the crimp. Make sure that the hook curve is facing towards the egg sinker.
- Step 4: Position a 1 ½” section of #10 wire into the crimp between the crimp and the egg sinker
- Step 6: Bend the #10 wire at a 90-degree angle and trim it so that there is about ¾” of wire sticking out.
Prepping the Ballyhoo & Positioning Your Rig:
- Step 7: After your ballyhoo is cleaned out, the eyes are removed, and you’ve loosened up its spine for better action in the water, the next step to rigging ballyhoo is positioning your rig onto the bait. To ensure that your bait lasts while trolling, soak your bait in brine or salt for a few hours.
- Step 8: Line up your pin to the ballyhoo so that you can gauge where the hook will exit the ballyhoo.
- Step 9: Use the hook to mark the precise spot where you'll want to have the hook exit the ballyhoo.
- Step 10: Slide the hook into the ballyhoo just beneath the gills and exit the bait where you’re made your prep mark.
Securing Your Pin Rig:
- Step 11: The next step in rigging ballyhoo is to make sure that you secure your pin rig. Position your egg sinker so that it sits just between the gills of the ballyhoo. Push the #10 wire up through both the top and bottom jaw.
- Step 12: Next, run the small section of rigging wire through the eyes twice behind the #10 wire so that you can close the gills.
- Step 13: Run the rigging wire in front of the egg sinker and across the nose of the ballyhoo behind the pin and then back around across the nose. Essentially, you're creating an “X” on the nose to cinch the egg sinker tight so that it remains on the ballyhoo's chin.
- Step 14: Wrap the wire down the bill of the ballyhoo and secure the leader underneath.
The Pinless Rig Ballyhoo Rigging Method
The pinless rig is similar to the pin rig method, except it doesn't have the # 10 wire pin. This particular rig uses the split-billed method to make the ballyhoo swim in a realistic fashion. It's best used when targeting bluefin tuna.
Constructing the pinless rig requires the following tackle:
- Monofilament Test Leader
- Rigging Wire
- ½ Ounce Egg Sinkers
- Single or Double Barrel Crimps
- Mustad Hooks
- Chafe Tubes (optional)
Instructions
Assembling The Rig:
- Step 1: Start out by sliding the crimp onto the leader.
- Step 2: Next, slide on the ½ ounce egg sinker and then the chafe tube (optional).
- Step 3: Run the leader through the Mustad hook and back through the crimp.
- Step 4: Cinch the crimp down into the Mustad hook eye.
- Step 5: Attach the rigging wire right between the egg sinker and the crimp.
Prepping the Ballyhoo & Positioning Your Rig:
- Step 6: After your ballyhoo has been prepped (see information above) for this ballyhoo rigging technique, you’ll want to position your rig.
- Step 7: Line up your rig to the ballyhoo so that you can measure out where the hook will exit the bait.
- Step 8: Use the hook to make a mark where you'll want to have the hook exit the ballyhoo.
- Step 9: Slide the hook into the ballyhoo (just underneath the gills) and exit the bait where you’re made your prep mark.
Securing Your Rig:
- Step 5: Run the rigging wire through the top and bottom jaw.
- Step 6: Run the wire in and around the eye socket twice to shut the gill and keep the egg sinker secure.
- Step 7: Run the wire over the top jaw. It should go around the weight and down the bill.
- Step 8: Once the egg sinker has been secured, use a knife to split the bill. Then run the leader through the slot.
Circle Hook Ballyhoo Rigging Method
The circle hook technique is popular if you’re fishing for marlin or billfish. This method is actually required for some tournaments. The circle hook technique allows you to be able to quickly change out your bait and is said to improve your hook-up percentage since it often leads to hooking the fish in the mouth. Read on for instructions on how to rig ballyhoo with this particular method.
Constructing the circle hook rig requires the following tackle:
- Monofilament Test Leader
- Rigging Wire (floss and a rigging needle could be substituted for wire)
- ¼ Ounce Egg Sinkers
- Size 10 Barrel Swivel
- 7/0 or 8/0 Non-offset Circle Hooks
Instructions
Assembling & Securing the Rig:
- Step 1:Crimp the leader to the non-offset circle hook.
- Step 2: Attach the rigging wire to one end of the barrel swivel and slide the other end of the barrel swivel onto the circle hook.
- Step 3: After your ballyhoo has been prepped for this ballyhoo rigging technique, insert the rigging wire into the ballyhoo’s mouth and down its throat. Then, slide the egg sinker on the rigging wire.
- Step 4: Take the wire and run it through and around the eye socket twice. This will close the gills and help secure the egg sinker to the ballyhoo.
- Step 5: Next, run the rigging wire through the bottom jaw, through the eye of the barrel swivel, and to the top of the ballyhoo nose.
- Step 6: Wrap the rigging wire around the ballyhoo twice, making sure to run it through the barrel swivel to keep it in its place.
Shop for Saltwater Tackle at Fish Razr
No matter your preference for rigging ballyhoo for trolling, we hope that this comprehensive guide helps guide you in the right direction for prepping your rigs and bait for tournaments or a fun time out on the open blue.
At Fish Razr, we proudly offer a wide selection of tournament-grade saltwater tackle, so you have everything you need for rigging ballyhoo. If you have questions about our products or have further questions on how to rig ballyhoo, feel free to contact our friendly customer service team. Shop Fish Razr today!